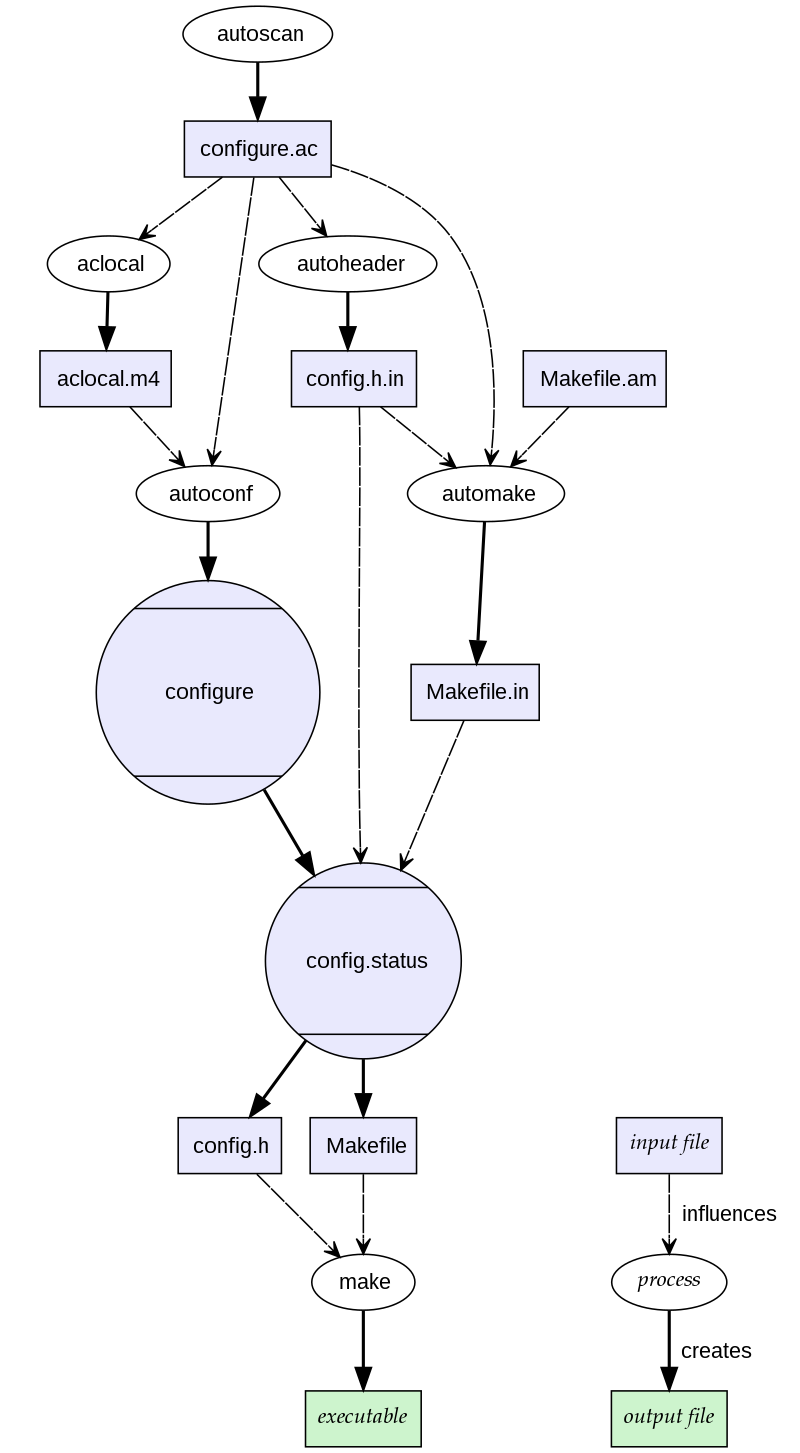
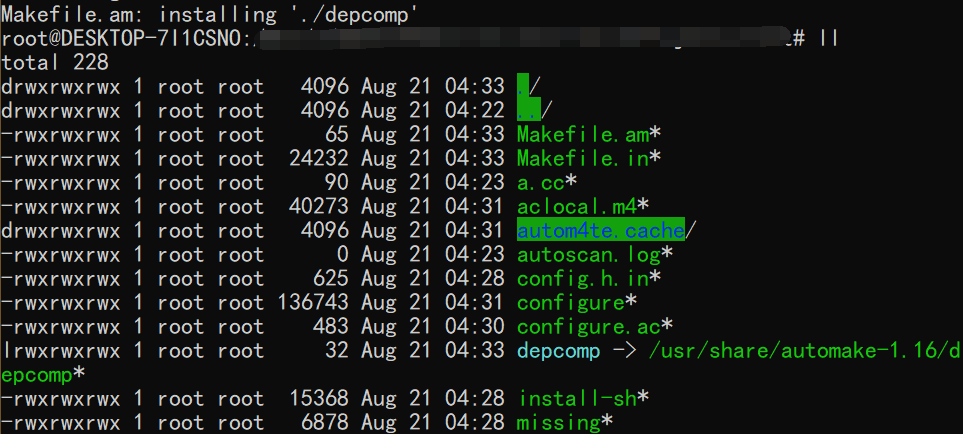
Loading... [GNU Autotools](https://en.wikipedia.org/wiki/GNU_Autotools)是一套非常流行的Unix-like系统下的生成工具。事实上,大多数人可能已经使用过它了——当你进行`.\configure`+`make`配置项目的时候,这实际上就是通过GNU Autotools进行打包生成的。 它的大体流程如下:  那么以下用一个简单的例子介绍一下整个流程,这里主要参考了[这篇文章](https://www.cnblogs.com/bugutian/p/5560548.html): ### 1 测试代码 在project folder下提供一份测试代码`a.cc`: ```cpp #include<iostream> using namespace std; int main() { cout<<"Hello World!"; return 0; } ``` 我们希望将它打包成为项目。这里仅做一个简单示例,对于更复杂的使用cmake管理的项目来说,我们只需要使用cmake替换右上角的分支,来产生Makefile输入即可。这也是为什么有些项目需要`.\configure`之后`cmake`,有些不需要的原因。 ### 2 安装必备工具 ```powershell apt install automake autoconf ``` automake包括aclocal、automake等;autoconf包括autoscan、autoconf等工具。 ### 3 产生并配置configure文件 接下来我们运行 ```powershell autoscan ``` 可以看到产生了configure文件: ```powershell drwxrwxrwx 1 root root 4096 Aug 21 04:23 ./ drwxrwxrwx 1 root root 4096 Aug 21 04:22 ../ -rwxrwxrwx 1 root root 90 Aug 21 04:23 a.cc* -rwxrwxrwx 1 root root 0 Aug 21 04:23 autoscan.log* -rwxrwxrwx 1 root root 465 Aug 21 04:23 configure.scan* ``` 此时我们给`configure.scan`改个名,并进入配置具体内容: ```powershell mv configure.scan configure.ac vim configure.ac ``` 将其内容配置如下: ```powershell # -*- Autoconf -*- # Process this file with autoconf to produce a configure script. AC_PREREQ([2.69]) AC_INIT(HELLO_PACKAGE, 1.0, xxx@yyy.zzz) #设置库名、版本号、反馈邮箱 AC_CONFIG_SRCDIR([a.cc]) # 设置源文件包含 AC_CONFIG_HEADERS([config.h]) AM_INIT_AUTOMAKE #设置AUTOMAKE # Checks for programs. AC_PROG_CXX # Checks for libraries. # Checks for header files. # Checks for typedefs, structures, and compiler characteristics. # Checks for library functions. AC_OUTPUT(Makefile) # 设置生成文件 ``` 其中,添加了中文注释的4行是需要我们手动添加、修改的。需要注意的是,这里[1]中的用法已经过时,本文的写法来自[2]。 ### 4 生成configure文件 然后我们运行以下命令: ```powershell aclocal autoconf # 产生configure文件 autoheader # 由于我们使用了AC_CONFIG_HEADER,因此需要通过这条命令产生configure.h.in ``` 可以看到已经产生了`configure`文件: ```powershell drwxrwxrwx 1 root root 4096 Aug 21 04:31 ./ drwxrwxrwx 1 root root 4096 Aug 21 04:22 ../ -rwxrwxrwx 1 root root 90 Aug 21 04:23 a.cc* -rwxrwxrwx 1 root root 40273 Aug 21 04:31 aclocal.m4* drwxrwxrwx 1 root root 4096 Aug 21 04:31 autom4te.cache/ -rwxrwxrwx 1 root root 0 Aug 21 04:23 autoscan.log* -rwxrwxrwx 1 root root 625 Aug 21 04:28 config.h.in* -rwxrwxrwx 1 root root 136743 Aug 21 04:31 configure* -rwxrwxrwx 1 root root 483 Aug 21 04:30 configure.ac* -rwxrwxrwx 1 root root 15368 Aug 21 04:28 install-sh* -rwxrwxrwx 1 root root 6878 Aug 21 04:28 missing* ``` ### 5 生成makefile 由于不使用cmake,我们需要手动创建`Makefile.am`用来自动生成`Makefile.in`。将它的内容写为: ```plaintext AUTOMAKE_OPTIONS=foreign # 软件等级 bin_PROGRAMS=hello # 生成的执行文件名 hello_SOURCES=a.cc # 源文件 ``` 然后运行 ```powershell automake --add-missing ``` 可以看到它成功生成了`Makefile.in`并同时安装了所需的库:  ### 6 打包 最后我们运行 ```powershell make dist ``` 即可生成`hello_package-1.0.tar.gz`文件,完成我们的打包工作。 ### 测试 最后我们测试安装流程即可: ```powershell tar -xvzf hello_package-1.0.tar.gz cd hello_package-1.0 ./configure make ``` 完成安装,运行 ```powershell ./hello ``` 运行程序即可看到结果:  [1]: https://www.cnblogs.com/bugutian/p/5560548.html [2]: https://www.gnu.org/software/automake/manual/automake.html#Modernize-AM_005fINIT_005fAUTOMAKE-invocation © 允许规范转载 打赏 赞赏作者 赞 1 如果觉得我的文章对你有用,请随意赞赏